Sitecore 9 and the Sitecore Installation Framework
Prior to Sitecore 9, setting up an instance of Sitecore either relied on running the Sitecore installer or extracting a ZIP file and jumping through a few hoops. This process was simplified with the introduction of Sitecore Instance Manager but it was still tedious when configuring different server roles. I will show you how to setup a Sitecore 9 instance, while it is not completely straightforward it is a lot more flexible.
Sitecore 9 Requirements
Base
- IIS 10 (IIS 8.5 is supported but I would recommend moving away from it)
- Windows Server 2016 ideally 64-bit (2012 R2 is supported but best avoided to use IIS 10)
- .NET Framework 4.6.2 or newer
- Microsoft Visual C++ 2015 Redistributable
- Microsoft SQL Server 2016 SP1
- Solr 6.6.2 or an Azure Search instance (if you are deploying to Azure PaaS it is recommended to use the same search provider for development as your hosting platform)
For development
- Visual Studio 2017 for development
- Windows 10 or Windows Server 2016 ideally 64-bit (8.1 and 2012 R2 are supported but best avoided to use IIS 10)
- At a minimum a 4 core CPU and 16GB RAM, ideally an i7 and 32GB RAM
- At least a dual-monitor setup
- PowerShell 5.1 or newer
- Web Platform 5.0 Installer
SIF has the following dependencies
- WebAdministration Module
- Web Deploy 3.6 for Hosting Servers
- URL Rewrite 2.1
- Microsoft SQL Server Data-Tier Application Framework (DacFx) version 2016
Contained Database Authentication
This needs to be enabled to use Web Deploy Packages
The following should be run in SQL Management Studio
sp_configure 'contained database authentication', 1;
GO
RECONFIGURE;
GO
Solr Setup
The next step is to install and configure Solr, fortunately Jeremy Davis has taken the pain out of this process and produced a script that not only installs Solr it creates and certificate and configures it.
Before running this script, make sure you have 1.8.0_151 64-bit version of JRE installed.
Param(
    $solrVersion = "6.6.2",
    $installFolder = "c:\solr",
    $solrPort = "8983",
    $solrHost = "solr",
    $solrSSL = $true,
    $nssmVersion = "2.24",
    $JREVersion = "1.8.0_151"
)

$JREPath = "C:\Program Files\Java\jre$JREVersion"
$solrName = "solr-$solrVersion"
$solrRoot = "$installFolder\$solrName"
$nssmRoot = "$installFolder\nssm-$nssmVersion"
$solrPackage = "https://archive.apache.org/dist/lucene/solr/$solrVersion/$solrName.zip"
$nssmPackage = "https://nssm.cc/release/nssm-$nssmVersion.zip"
$downloadFolder = "~\Downloads"

## Verify elevated
## https://superuser.com/questions/749243/detect-if-powershell-is-running-as-administrator
$elevated = [bool](([System.Security.Principal.WindowsIdentity]::GetCurrent()).groups -match "S-1-5-32-544")
if($elevated -eq $false)
{
    throw "In order to install services, please run this script elevated."
}

function downloadAndUnzipIfRequired
{
    Param(
        [string]$toolName,
        [string]$toolFolder,
        [string]$toolZip,
        [string]$toolSourceFile,
        [string]$installRoot
    )

    if(!(Test-Path -Path $toolFolder))
    {
        if(!(Test-Path -Path $toolZip))
        {
            Write-Host "Downloading $toolName..."
            Start-BitsTransfer -Source $toolSourceFile -Destination $toolZip
        }

        Write-Host "Extracting $toolName to $toolFolder..."
        Expand-Archive $toolZip -DestinationPath $installRoot
    }
}
# download & extract the solr archive to the right folder
$solrZip = "$downloadFolder\$solrName.zip"
downloadAndUnzipIfRequired "Solr" $solrRoot $solrZip $solrPackage $installFolder

# download & extract the nssm archive to the right folder
$nssmZip = "$downloadFolder\nssm-$nssmVersion.zip"
downloadAndUnzipIfRequired "NSSM" $nssmRoot $nssmZip $nssmPackage $installFolder

# Ensure Java environment variable
$jreVal = [Environment]::GetEnvironmentVariable("JAVA_HOME", [EnvironmentVariableTarget]::Machine)
if($jreVal -ne $JREPath)
{
    Write-Host "Setting JAVA_HOME environment variable"
    [Environment]::SetEnvironmentVariable("JAVA_HOME", $JREPath, [EnvironmentVariableTarget]::Machine)
}

# if we're using HTTP
if($solrSSL -eq $false)
{
    # Update solr cfg to use right host name
    if(!(Test-Path -Path "$solrRoot\bin\solr.in.cmd.old"))
    {
        Write-Host "Rewriting solr config"

        $cfg = Get-Content "$solrRoot\bin\solr.in.cmd"
        Rename-Item "$solrRoot\bin\solr.in.cmd" "$solrRoot\bin\solr.in.cmd.old"
        $newCfg = $newCfg | % { $_ -replace "REM set SOLR_HOST=192.168.1.1", "set SOLR_HOST=$solrHost" }
        $newCfg | Set-Content "$solrRoot\bin\solr.in.cmd"
    }
}

# Ensure the solr host name is in your hosts file
if($solrHost -ne "localhost")
{
    $hostFileName = "c:\\windows\system32\drivers\etc\hosts"
    $hostFile = [System.Io.File]::ReadAllText($hostFileName)
    if(!($hostFile -like "*$solrHost*"))
    {
        Write-Host "Updating host file"
        "`r`n127.0.0.1`t$solrHost" | Add-Content $hostFileName
    }
}

# if we're using HTTPS
if($solrSSL -eq $true)
{
    # Generate SSL cert
    $existingCert = Get-ChildItem Cert:\LocalMachine\Root | where FriendlyName -eq "$solrName"
    if(!($existingCert))
    {
        Write-Host "Creating & trusting an new SSL Cert for $solrHost"

        # Generate a cert
        # https://docs.microsoft.com/en-us/powershell/module/pkiclient/new-selfsignedcertificate?view=win10-ps
        $cert = New-SelfSignedCertificate -FriendlyName "$solrName" -DnsName "$solrHost" -CertStoreLocation "cert:\LocalMachine" -NotAfter (Get-Date).AddYears(10)

        # Trust the cert
        # https://stackoverflow.com/questions/8815145/how-to-trust-a-certificate-in-windows-powershell
        $store = New-Object System.Security.Cryptography.X509Certificates.X509Store "Root","LocalMachine"
        $store.Open("ReadWrite")
        $store.Add($cert)
        $store.Close()

        # remove the untrusted copy of the cert
        $cert | Remove-Item
    }

    # export the cert to pfx using solr's default password
    if(!(Test-Path -Path "$solrRoot\server\etc\solr-ssl.keystore.pfx"))
    {
        Write-Host "Exporting cert for Solr to use"

        $cert = Get-ChildItem Cert:\LocalMachine\Root | where FriendlyName -eq "$solrName"

        $certStore = "$solrRoot\server\etc\solr-ssl.keystore.pfx"
        $certPwd = ConvertTo-SecureString -String "secret" -Force -AsPlainText
        $cert | Export-PfxCertificate -FilePath $certStore -Password $certpwd | Out-Null
    }

    # Update solr cfg to use keystore & right host name
    if(!(Test-Path -Path "$solrRoot\bin\solr.in.cmd.old"))
    {
        Write-Host "Rewriting solr config"

        $cfg = Get-Content "$solrRoot\bin\solr.in.cmd"
        Rename-Item "$solrRoot\bin\solr.in.cmd" "$solrRoot\bin\solr.in.cmd.old"
        $newCfg = $cfg | % { $_ -replace "REM set SOLR_SSL_KEY_STORE=etc/solr-ssl.keystore.jks", "set SOLR_SSL_KEY_STORE=$certStore" }
        $newCfg = $newCfg | % { $_ -replace "REM set SOLR_SSL_KEY_STORE_PASSWORD=secret", "set SOLR_SSL_KEY_STORE_PASSWORD=secret" }
        $newCfg = $newCfg | % { $_ -replace "REM set SOLR_SSL_TRUST_STORE=etc/solr-ssl.keystore.jks", "set SOLR_SSL_TRUST_STORE=$certStore" }
        $newCfg = $newCfg | % { $_ -replace "REM set SOLR_SSL_TRUST_STORE_PASSWORD=secret", "set SOLR_SSL_TRUST_STORE_PASSWORD=secret" }
        $newCfg = $newCfg | % { $_ -replace "REM set SOLR_HOST=192.168.1.1", "set SOLR_HOST=$solrHost" }
        $newCfg | Set-Content "$solrRoot\bin\solr.in.cmd"
    }
}

# install the service & runs
$svc = Get-Service "$solrName" -ErrorAction SilentlyContinue
if(!($svc))
{
    Write-Host "Installing Solr service"
    &"$installFolder\nssm-$nssmVersion\win64\nssm.exe" install "$solrName" "$solrRoot\bin\solr.cmd" "-f" "-p $solrPort"
    $svc = Get-Service "$solrName" -ErrorAction SilentlyContinue
}
if($svc.Status -ne "Running")
{
    Write-Host "Starting Solr service"
    Start-Service "$solrName"
}

# finally prove it's all working
$protocol = "http"
if($solrSSL -eq $true)
{
    $protocol = "https"
}
Invoke-Expression "start $($protocol)://$($solrHost):$solrPort/solr/#/"
What the SIF?
Sitecore 9 has now introduced the Sitecore Installation Framework (SIF). SIF comprises of a PowerShell module that supports both local and remote installations of Sitecore. It is fully extensible through JSON configuration and PowerShell scripts which deploy Web Deploy Packages into an environment. It is possible to deploy the entire Sitecore Experience Platform or just Experience Management.
To install SIF you can download and install it from the Sitecore Gallery using the following PowerShell commands in an administrator shell:
Register-PSRepository -Name SitecoreGallery -SourceLocation https://sitecore.myget.org/F/sc-powershell/api/v2
Install-Module SitecoreInstallFramework
If you get a prompt when installing modules from an untrusted repository, press Y and ENTER

For developer installations, it is also required to install the Sitecore Fundamentals module which allows the creation of self-signed certificates for development environments.
Install-Module SitecoreFundamentals
If you get a prompt when installing modules from an untrusted repository, press Y and ENTER

Single Server Development Instance
This might have seen like a lot of steps to jump through to get this far however you only need to configure these things once, no matter how many instances of Sitecore you install. Unless you have a very specific scenario, typically you will want an XP Single (XP0) instance for development purposes.
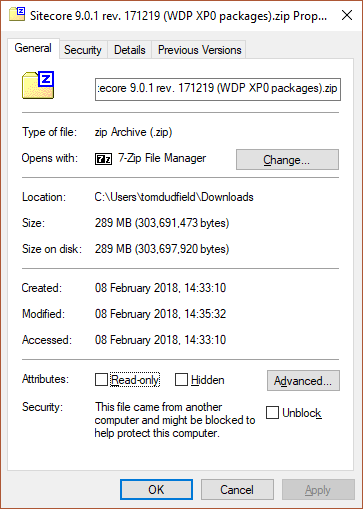
First things first, download the latest version of Sitecore 9 for On-Premises deployment, in my instance, this was Sitecore 9.0.1 rev. 171219 (WDP XP0 packages).zip. Once the file is downloaded make sure that you unblock it.

Once extracted, go into the extracted files and extract XP0 Configuration files 9.0.1 rev. 171219.zip and copy all the files into the root folder alongside the scwdp zip files.
Also, locate your license.xml file and copy it into this directory.
To simply this process Sitecore has provided a PowerShell script to call SIF with the payload JSON. This will need to be adapted to match the configuration of your local environment.
# Add the Sitecore MyGet repository to PowerShell
#Register-PSRepository -Name SitecoreGallery -SourceLocation https://sitecore.myget.org/F/sc-powershell/api/v2

# Install the Sitecore Install Framwork module
#Install-Module SitecoreInstallFramework

# Install the Sitecore Fundamentals module (provides additional functionality for local installations like creating self-signed certificates)
#Install-Module SitecoreFundamentals

# Import the modules into your current PowerShell context (if necessary)
Import-Module SitecoreFundamentals
Import-Module SitecoreInstallFramework

#define parameters
$prefix = "sc90"
$PSScriptRoot = "C:\Users\tomdudfield\Downloads\Sitecore 9.0.1 rev. 171219 (WDP XP0 packages)"
$XConnectCollectionService = "$prefix.xconnect"
$sitecoreSiteName = "$prefix.local"
$SolrUrl = "https://solr:8983/solr"
$SolrRoot = "C:\solr\solr-6.6.2"
$SolrService = "solr-6.6.2"
$SqlServer = "localhost"
$SqlAdminUser = "sa"
$SqlAdminPassword = "Pa55word"

#install client certificate for xconnect
$certParams =
@{
    Path = "$PSScriptRoot\xconnect-createcert.json"
    CertificateName = "$prefix.xconnect_client"
}
Install-SitecoreConfiguration @certParams -Verbose

#install solr cores for xdb
$solrParams =
@{
    Path = "$PSScriptRoot\xconnect-solr.json"
    SolrUrl = $SolrUrl
    SolrRoot = $SolrRoot
    SolrService = $SolrService
    CorePrefix = $prefix
}
Install-SitecoreConfiguration @solrParams -Verbose

#deploy xconnect instance
$xconnectParams =
@{
    Path = "$PSScriptRoot\xconnect-xp0.json"
    Package = "$PSScriptRoot\Sitecore 9.0.1 rev. 171219 (OnPrem)_xp0xconnect.scwdp.zip"
    LicenseFile = "$PSScriptRoot\license.xml"
    Sitename = $XConnectCollectionService
    XConnectCert = $certParams.CertificateName
    SqlDbPrefix = $prefix
    SqlServer = $SqlServer
    SqlAdminUser = $SqlAdminUser
    SqlAdminPassword = $SqlAdminPassword
    SolrCorePrefix = $prefix
    SolrURL = $SolrUrl
}
Install-SitecoreConfiguration @xconnectParams -Verbose

#install solr cores for sitecore
$solrParams =
@{
    Path = "$PSScriptRoot\sitecore-solr.json"
    SolrUrl = $SolrUrl
    SolrRoot = $SolrRoot
    SolrService = $SolrService
    CorePrefix = $prefix
}
Install-SitecoreConfiguration @solrParams -Verbose

#install sitecore instance
$sitecoreParams =
@{
    Path = "$PSScriptRoot\sitecore-XP0.json"
    Package = "$PSScriptRoot\Sitecore 9.0.1 rev. 171219 (OnPrem)_single.scwdp.zip"
    LicenseFile = "$PSScriptRoot\license.xml"
    SqlDbPrefix = $prefix
    SqlServer = $SqlServer
    SqlAdminUser = $SqlAdminUser
    SqlAdminPassword = $SqlAdminPassword
    SolrCorePrefix = $prefix
    SolrUrl = $SolrUrl
    XConnectCert = $certParams.CertificateName
    Sitename = $sitecoreSiteName
    XConnectCollectionService = "https://$XConnectCollectionService"
}
Install-SitecoreConfiguration @sitecoreParams -Verbose
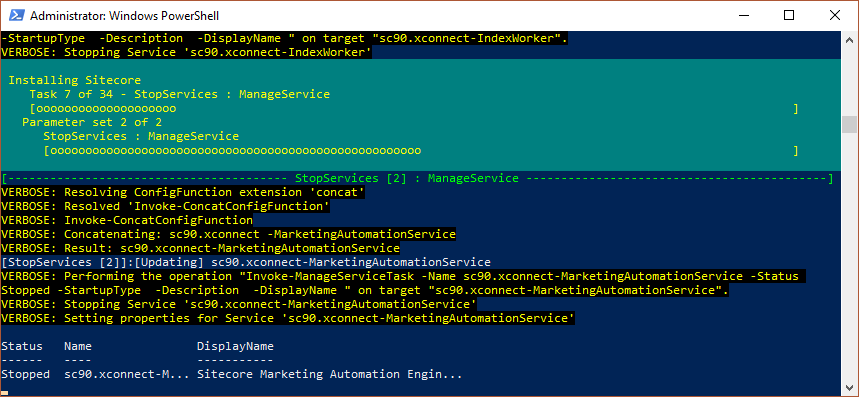
Save this into the directory and run the script.

Once complete you should have a clean Sitecore 9 instance.
This is the simplest way to get Sitecore installed, for more advanced scenarios the JSON payload or SCWDP's can be adapted to support this. This process can be used for production servers and even to remotely deploy Sitecore, although it is worth turning to the Sitecore official documentation to ensure this process is followed correctly.